
Have you ever felt the urge to create something truly unique with your hands? If so, Pyntekvister might just be the perfect outlet for your creativity. This fascinating craft combines intricate patterns and vibrant colors, allowing beginners and seasoned artists alike to express themselves in new ways. Whether you’re looking for a relaxing hobby or a way to unleash your artistic flair, diving into Pyntekvister can open up a world of possibilities. Let’s embark on this journey together as we explore tips and tricks that will help you master the art of Pyntekvister!
Understanding the Basics of Pyntekvister
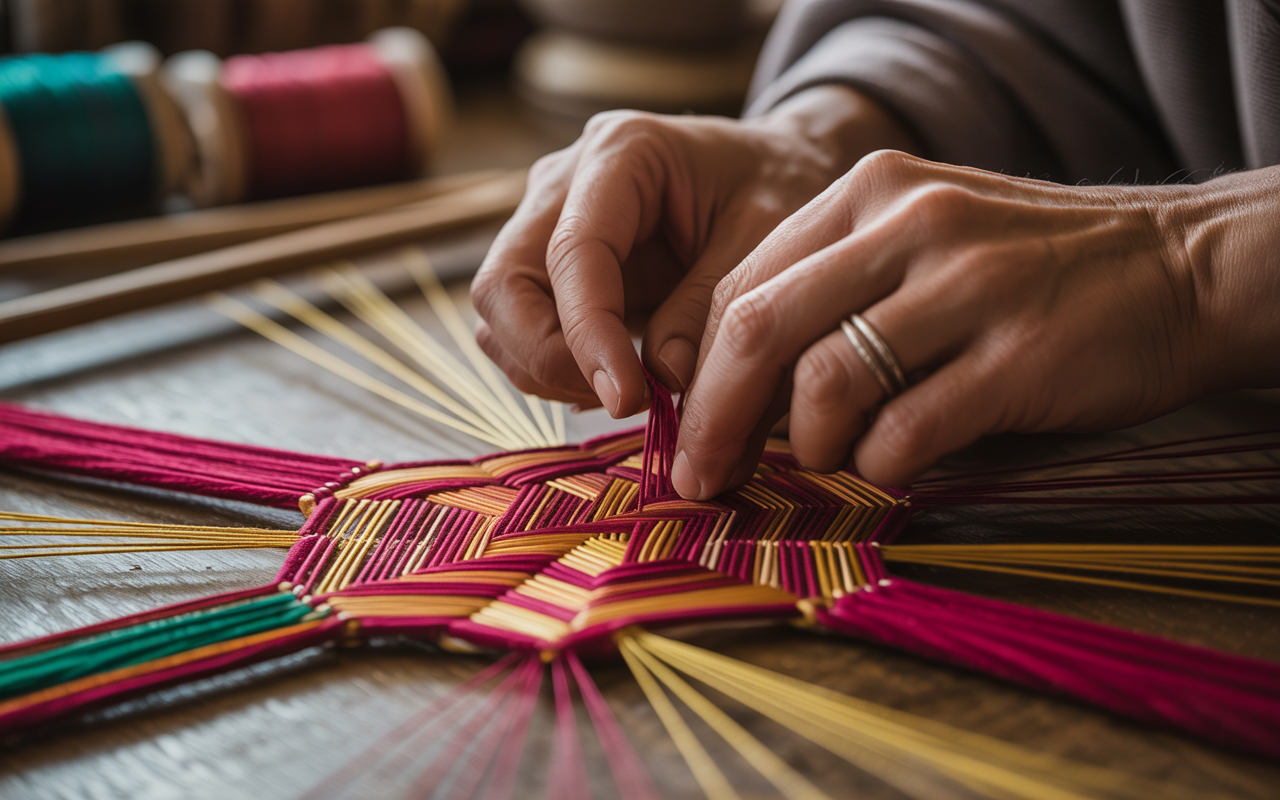
Pyntekvister is a fascinating craft that combines creativity with tradition. At its core, it involves intricate folding and weaving techniques to create stunning patterns and designs.
Understanding the basics starts with familiarizing yourself with essential terms. You’ll often encounter words like “weave,” referring to how materials are interlaced, or “fold,” which describes the technique of bending paper or fabric into shapes.
The choice of medium also plays a crucial role in Pyntekvister. While many beginners opt for paper, experimenting with fabrics can yield unique results.
A sturdy workspace helps too; having enough room to spread out your materials allows for better focus on your project. Embrace trial and error as you learn—mistakes often lead you down new creative paths.
As you explore this art form, remember that patience is key. Each fold brings you closer to mastering the beautiful intricacies of Pyntekvister.
Getting Started: Essential Tools and Materials
To dive into the world of Pyntekvister, having the right tools and materials is crucial. Start with high-quality paper or canvas as your base. Each texture will influence your final design.
Next, gather sharp scissors for precise cutting. A craft knife can also be useful for intricate details that scissors might struggle to achieve.
Don’t forget a good adhesive. Glue sticks work well for lighter papers, while stronger adhesives are essential for heavier materials.
Colorful markers or paints can bring your creations to life. Choose shades that resonate with you; this is where personalization begins!
A ruler and pencil help maintain clean lines and measurements. Planning ahead reduces mistakes and enhances creativity throughout your journey in Pyntekvister.
Step-by-Step Guide to Creating Your First Pyntekvist
Creating your first Pyntekvist can be an exciting experience. Start by gathering all necessary materials: colored paper, scissors, glue, and a ruler.
Begin with the base shape. Cut out a square piece of paper—this will serve as your canvas.
Next, think about patterns or designs you’d like to incorporate. Use the ruler to help measure and mark equal sections on the square for accuracy.
Cut smaller shapes from different colors that complement each other well. These pieces are essential for layering in your design.
Once you have everything cut out, start assembling them on the base square using glue. Layering adds depth and character to your creation.
Don’t rush this part; take time to arrange the pieces until you’re satisfied with how they look together.
After everything is glued down and secure, allow it to dry completely before displaying or adding any finishing touches like embellishments or textures.
Tips for Adding Personal Touches and Customization
Personalizing your Pyntekvister creations can transform an ordinary piece into a treasured masterpiece. Start by incorporating colors that resonate with you. Choose hues that evoke memories or feelings, making each work uniquely yours.
Textures play a significant role too. Experiment with different materials like fabric, paper, or even natural elements such as leaves and twigs. This tactile variety will add depth to your projects.
Consider adding small details that reflect your personality—perhaps a favorite quote or an image that inspires you. These touches not only enhance the aesthetic but also connect your art to your story.
Don’t shy away from mixing styles! Combine traditional techniques with modern flair for a one-of-a-kind creation. Remember, there are no strict rules in Pyntekvister; it’s about expressing who you are through every stroke and embellishment.
Common Mistakes to Avoid
One common mistake beginners make in Pyntekvister is overlooking the importance of precise measurements. Accurate dimensions are crucial for achieving a polished look.
Another pitfall is rushing through the process. Patience allows you to focus on details, ensuring each element fits seamlessly together.
Many newcomers also underestimate the significance of choosing quality materials. Subpar supplies can lead to frustrating results and diminish your creative vision.
Additionally, ignoring basic techniques can hinder progress. Mastering foundational skills early on paves the way for more complex projects later.
Don’t shy away from seeking feedback. Engaging with fellow enthusiasts can offer valuable insights and help you grow as an artist in this craft.
Where to Find Inspiration and Resources
Finding inspiration for Pyntekvister can be an exciting journey. The internet is brimming with resources. Websites like Pinterest and Instagram showcase countless creations that spark creativity.
Books about Pyntekvister techniques are also valuable. They provide in-depth knowledge and unique patterns to try. Local libraries often have great craft sections, so don’t hesitate to explore there.
Joining online forums or social media groups dedicated to Pyntekvister can connect you with fellow enthusiasts. Sharing ideas and tips within these communities fosters growth.
Workshops in your area might offer hands-on experiences as well. Learning from experienced practitioners can ignite your passion further.
Don’t forget nature! It’s a fantastic source of color palettes and textures, perfect for infusing into your work. Whether it’s a walk in the park or observing seasonal changes, let the world around you inspire your next project.
Benefits of Practicing Pyntekvister
Practicing Pyntekvister offers a delightful escape from the everyday hustle. Engaging in this craft allows you to unwind while nurturing your creativity.
It enhances focus and concentration as each detail comes together. This mindful process can reduce stress levels, providing both mental clarity and relaxation.
Furthermore, Pyntekvister fosters a sense of achievement. Completing a piece gives you pride in your work, boosting self-confidence with every creation.
Social connections also flourish through shared interests. Joining clubs or online communities opens doors to friendships with like-minded individuals eager to share tips and experiences.
It’s an avenue for personal expression. Each design reflects individuality, making every project unique to its creator.
Taking Your Skills to the Next Level: Advanced Techniques
As you grow more comfortable with Pyntekvister, exploring advanced techniques can elevate your creations to new heights. Consider experimenting with different materials and textures. Using varied fabrics or adding elements like beads or embroidery can enhance the visual appeal of your pieces.
Dive into layering techniques to create depth in your work. This method adds dimension and intrigue, allowing for a more sophisticated design. You might also explore mixed media approaches by combining Pyntekvister with other art forms such as painting or collage.
Don’t forget about color theory! Understanding how colors interact will help you make choices that resonate well together, creating a cohesive look that captivates viewers.
Networking with other enthusiasts is another great way to advance your skill set. Join online forums or local workshops where experienced practitioners share tips and tricks that could enrich your understanding of this craft.
Remember, practice is key when mastering any technique. The beauty of Pyntekvister lies not just in the finished product but in the journey itself—a chance to express creativity uniquely while honing skills over time. Keep pushing boundaries and challenge yourself regularly; each project is an opportunity for growth!